Our Timeline
by Carol Ryan
The Lines
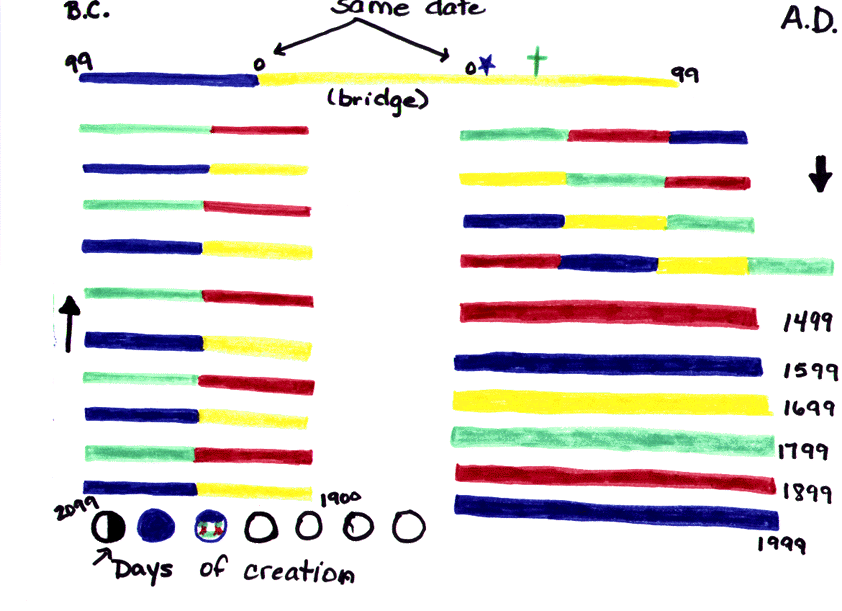
I purchased the timeline strips from Konos for $ 9.95. *** (Timeline Lines Only, No figures)*** Each strip is approximately 17″ long and 1 1/4″ wide. Here’s a drawing of our timeline:

The Dates
When you are looking at the timeline dates below, each from/through date (ex. 299 – 200 BC) is one timeline strip unless otherwise noted. The dates on the strips are as follows: (remember to go “backwards” or rather “up” for the BC side of the timeline.)
Dates for the left side (BC) of the timeline:
99 – 0 BC ———-(bridge)——-> right side starts here:
299 – 200 BC, 199 – 100 BC
499 – 400 BC, 399 – 300 BC
699 – 600 BC, 599 – 500 BC
899 – 800 BC, 799 – 700 BC
1099 – 1000 BC, 999 – 900 BC
1299 – 1200 BC, 1199 – 1100 BC
1499 – 1400 BC, 1399 – 1300 BC
1699 – 1600 BC, 1599 – 1500 BC
1899 – 1800 BC, 1799 – 1700 BC
2099 – 2000 BC, 1999 – 1900 BC
CREATION
Now you are going to look at the right side (AD) of the timeline: (going “down” the scale now)
0 – 99 AD
100 – 199 AD, 200 – 299 AD, 300 – 399 AD
400 – 499 AD, 500 – 599 AD, 600 – 699 AD
700 – 799 AD, 800 – 899 AD, 900 – 999 AD
1000-1099 AD, 1100-1199 AD, 1200-1299 AD, 1300-1399 AD
1400 – 1499 AD (3 strips)
1500 – 1599 AD (3 strips)
1600 – 1699 AD (3 strips)
1700 – 1799 AD (3 strips)
1800 – 1899 AD (3 strips)
1900 – 1999 AD (3 strips)
I listed the strips according to how I placed them on the wall. Yours may be different according to the space size and shape you have to work with on your own wall. The reason that the dates 1400 – 1999 AD have three strips each is because we have so much more information to add to the timeline there. (More discoveries, better records, more pictures, etc.) Also, the “bridge” is several blank strips long just to give some space between the two halves of the timeline and also, I have mine running over the top of a doorway. So the BC side runs up the left side of the door, the bridge runs over the top of the doorway, and the AD side runs down the right side of the door.
The Pictures
Now to add in figures for your timeline:
Biblical Characters
I found old Sunday School literature that had drawings (flannel board figures) depicting the seven days of creation. These are circles, approximately 3″ in diameter. (I re-sized them for this purpose.) The circles are placed in order at the bottom of our timeline which begins at 2099 BC.
For Jesus’ birth, I used a Christmas card that had a nice child-like nativity scene. This is placed at 0 A.D.
For Jesus’ death, I put up a simple green construction paper cross (green for new life). This is at 33 A.D.

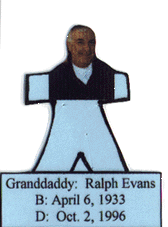
Next I added in our immediate family members and grandparents. This helps to give the child a perspective on just how long ago a book was printed. My children can easily understand that Ping is as old as Granddaddy because it was written the year Granddaddy was born! (My dad enjoyed this distinction! *g*) Don’t forget to add the children on their birth date as well!

To get the above figures, I used a gingerbread cookie cutter for the outline. (Girls get a skirt.) Then I scanned in a picture of the family member, placing it on top of the gingerbread man’s head. Then I added in the text box for the birth/death date. Girls are printed on pink cardstock and boys are printed on blue. All figures are laminated. I use a small laminator I got on sale. You could also use clear contact paper.
When reading chapter books (usually biographies) I put up a figure on the timeline to represent that character as well. Here’s one we put up after reading one of the Little House books by Laura Ingalls Wilder.
Here’s how I enter the Five In A Row (FIAR) books:
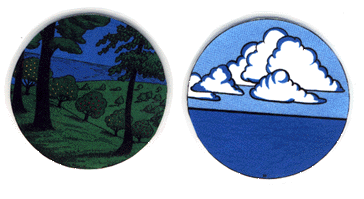
This is created by first scanning in a story disk from the colored, laminated disks I bought from the Lamberts. I added the appropriate information for each FIAR title:
Author:
Illustrator:
© date
Awards:
My FIAR “books” are 3 1/2″ tall and 2 1/2″ wide. The story disks, which sell for $15.00, can be purchased by using the order form at the FIAR web site. Another option is to use a copy of the story disks found in the back of the manual. Just color them in! Night of the Moonjellies story disk ©Copyright 1995 Jane Claire Lambert- used by permission
Further Resources
Several people have asked me where I find the photos for the timeline figures. Often, a biography will have a good picture in it. Other than that, I look in old textbooks. Our local school district has a book depository. It’s a warehouse filled with unwanted textbooks that are free to the public. I go in and find history, biology, social studies, literature…. any text that might have a picture I want out of it. In the literature books you’ll often find pictures of famous authors. Science books have good pictures of scientists (Marie Curie, Albert Einstein, etc.) In the history books you’ll find famous people throughout history but also a lot of good pictures of landmarks. An example would be the Statue of Liberty. You would put a picture of that on the timeline on the date it was presented as a gift to the United States from France. Whatever you are studying, you can find a piece of history to go onto the timeline!
I hope this page has given you some help in creating your own inexpensive timeline. If you have any questions, please feel free to e-mail me.
* For more articles by this Author Click Here
* For more articles on History Click Here
* For more articles on Homeschooling Click Here